

There are two kinds of CD discs you can burn on Windows. First is the Audio CD, which can be played in the car stereo, home audio systems/stereos, computer CD drive, and more. Second is the Data CD, which is usually used to back up files, and basically only play on computers. A small number of car CD players support formats like MP3 so they will be able to read Data CD. Under the circumstances, many people prefer to burn Audio CDs instead of Data CDs.
Audio CD is time-based. A standard Audio CD can hold 80 minutes/700MB. That means it will accommodate up to 80 minutes of sound in theory. If you have 100MB of audio files that add up to 2h, you can still only burn 80min to the Audio CD. How is that?
When you are burning an Audio CD, all the audio files’ encoding is still in accordance with the CD-DA Red Book specifications (Audio CDs are uncompressed audio specifically 16-bit stereo LPCM at 44.1 Khz). That’s why it’s time-based and the output size will usually be much larger than the original file size.
In this post, you can quickly learn how to burn songs to an Audio CD on Windows 10, 8/8.1, 7. Keep reading.
Burn Songs to an Audio CD on Windows with 3 Easy Steps
BlurayVid DVD Creator is able to burn almost all the audio files to an Audio CD on Windows. The output audio quality is perfect without quality loss. It is really simple and easy to use. You will also find the program has a concise style that looks quite beautiful. CD burning is one of its features but that’s not all. It is also powerful in Blu-ray/DVD authoring.
Free Download
Step 1. Insert a CD-R or a CD-RW Disc to Your Computer Drive
Open the internal/external disc drive of your computer, and then insert a CD-R (Compact Disc-Recordable) disc or a CD-RW (Compact Disc-ReWritable) disc. Most of the CD players are able to read both CD-R and CD-RW. Old CD players might only handle CD-R.
Step 2. Launch DVD Creator and Select “CD Burner”
Launch BlurayVid DVD Creator on your PC. There are many CD/DVD/Blu-ray tools to select. “CD Burner” is the one we need to use.

Step 3. Add Music and Burn Songs to Audio CD
Hit the big icon in the middle to add songs to the CD burner. Audio files in almost all formats can be successfully imported.
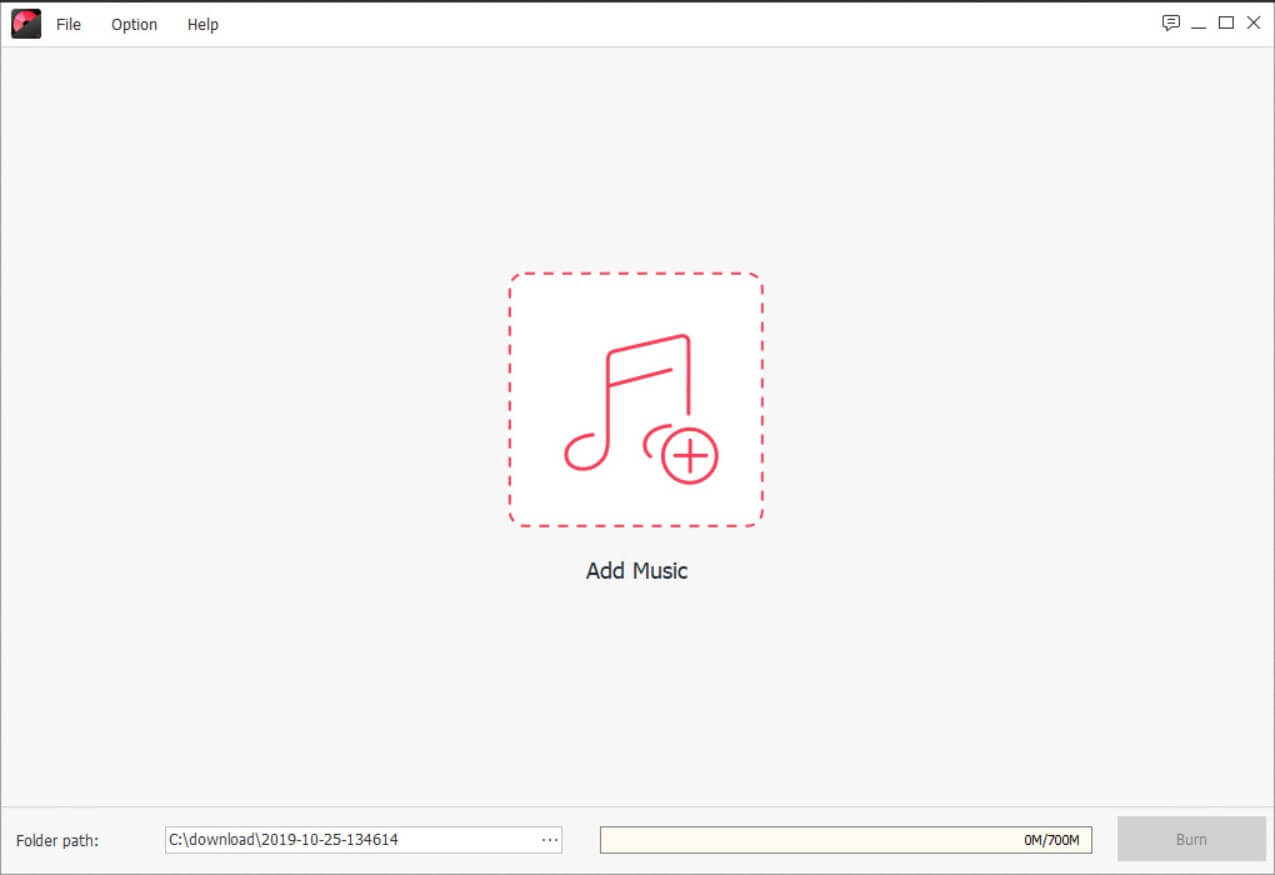
You can drag the songs to adjust the sequence. Then, click on “Burn” to start burning music to an Audio CD.

Technical Specifications
Supported Audio File Formats
Dolby AC3 Audio Files (*.ac3)
MPEG Audio Files (*.mp3; *.mp2; *.m4a)
Windows Media Audio Files (*.wma)
Advanced Audio Coding File (*.aac)
Matroska Audio File (*.mka)
Audio Interleave File Formats (*.aif; *.aiff)
Real Audio Files (*.ra; *.ram)
Lossless Audio Files (*.wav; *.ape; *.flac)
OGG Vorbis Audio File (*.ogg)
Supported Operating Systems
Windows 10/8/7/Vista/XP
Mac OS X 10.14, 10.13, 10.12, 10.11, 10.10, 10.9, 10.8, 10.7.
Trial Version Limitations
“CD Burner” and “CD Converter” is unavailable in the trial version. You will need to purchase a license to enjoy the benefits of the full version. The trial version can only burn DVD/Blu-ray disc with a watermark.
If you need only a CD burner, there are some free tools that work on Windows 10, Windows 8, and Windows 7. BlurayVid DVD Creator we recommended above is a paid alternative. It is not only a CD burning software but also a powerful Blu-ray/DVD creator. It helps you create amazing homemade DVDs without much afford. Welcome to download and have a try on your PC.
Free Download Buy It Now