
It is a popular demand to make video slideshow. Since contents on a DVD disc is quite suitable for keep and display, some of the people would like to make DVD slideshow, which means to import lots of pictures to create a video slideshow, and then burn the video to a recordable DVD disc.
This DVD Slideshow Maker is highly recommended. After importing photos, it will automatically generate a video slideshow, and then you can insert a DVD disc to start burning. By using just one tool, you are able to get a professional-looking DVD slideshow in a very short amount of time.
Some Useful Features of DVD Slideshow Maker
• Nimbly adjust the photo order, photo duration, transition duration, and transition effect.
• It provides amazing DVD menu templates in several themes, which including Memory, Holiday, Standard, Movie, Travel, Family Life, Sport and “No Menu”.
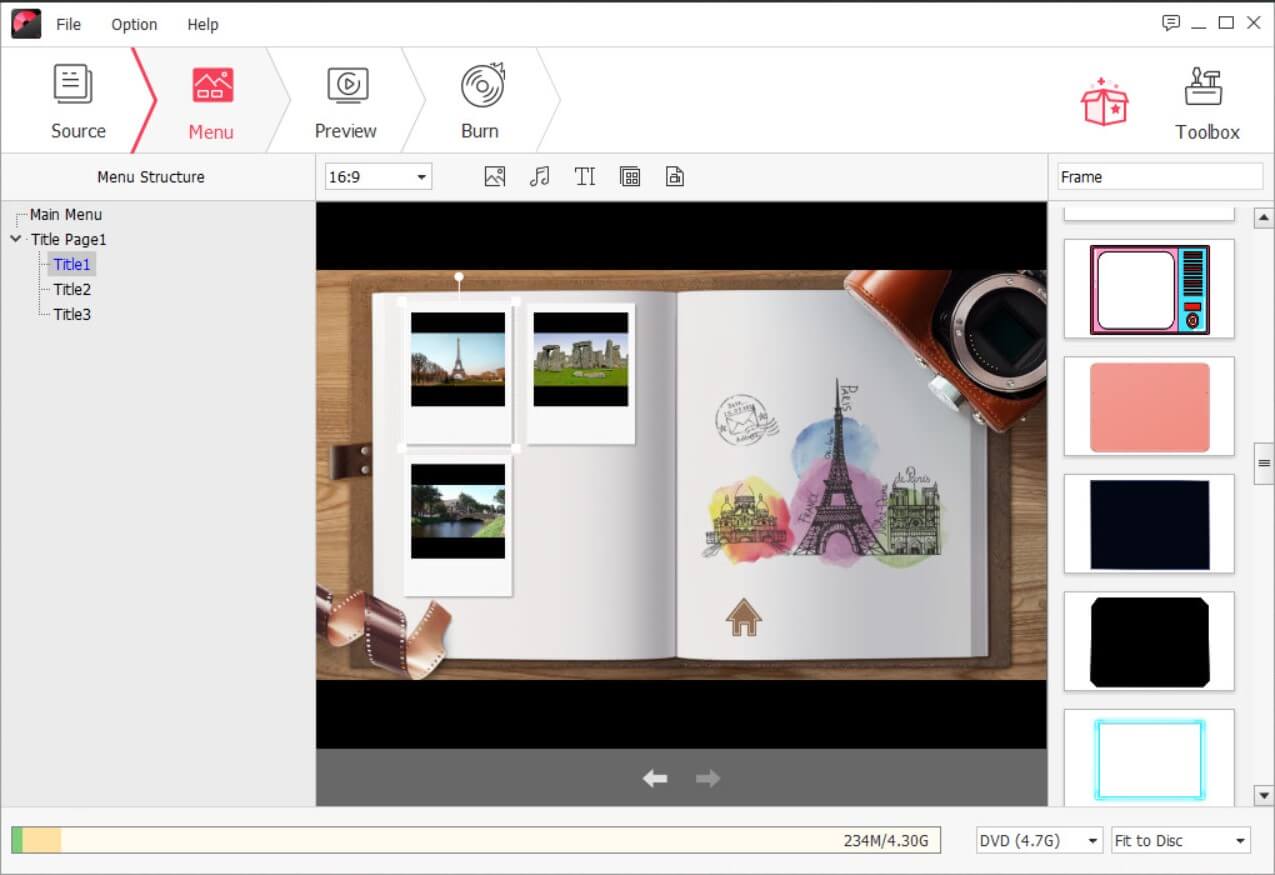
• Freely customize the DVD menu. You are able to rename the title, change the background music, background image, add/delete text, change the frame, .etc.
• Supports burning photos to a video DVD disc or a data DVD disc. Though the data DVD is similar to a USB stick that is mainly used for file backup, it still gives you a richer choice.
• Allows importing a large number of pictures to a DVD 5/9 disc.
Download the free trial of the photo DVD maker. Let’s start turning photos into DVD slideshow with music.
Free Download Free Download
How to Burn Pictures to a Playable DVD Disc on Windows/Mac
Step 1. Choose “Create a DVD Video Disc”
Launch DVD Slideshow Maker. The most important tools will be shown on the main interface. To create a DVD slideshow, we will need to burn pictures as slideshow video to a playable DVD disc, so click on “Create a DVD Video Disc”.

Step 2. Add Pictures to the Program
Import images into the program in batches. DVD Slideshow Maker allows adding Bitmap File (*.bmp), JPEG (*.jpg, *.jpeg), PNG (*.png), GIF (*.gif), and TIFF (*.tif, *.tiff) files.

Step 3. Put the Photo Gallery in the Right Order
Here you can add new titles and new slideshows. Photos of different themes are best placed separately. For example, you visited Europe and went to three different countries. Then you can choose to put them under three different titles. You may change the title name and the slideshow name as you like.

Step 4. Edit the Slideshow – Adjust Sequence, Effect, Transition, Text, and Music
Click the Edit icon of a specific slideshow. You can drag an image or multiple images at the same time to customize the video sequence. Beyond that, for each photo, you can adjust its effect, transition, background music and add text on it.

Step 5. Select a Template and Customize DVD Menu
Next, click on “Menu”. There are seven themes for you to choose from – nearly 100 templates altogether. The background picture, the background music, the text, the thumbnail can all be customized. You can also choose “No Menu” if you like none of them.
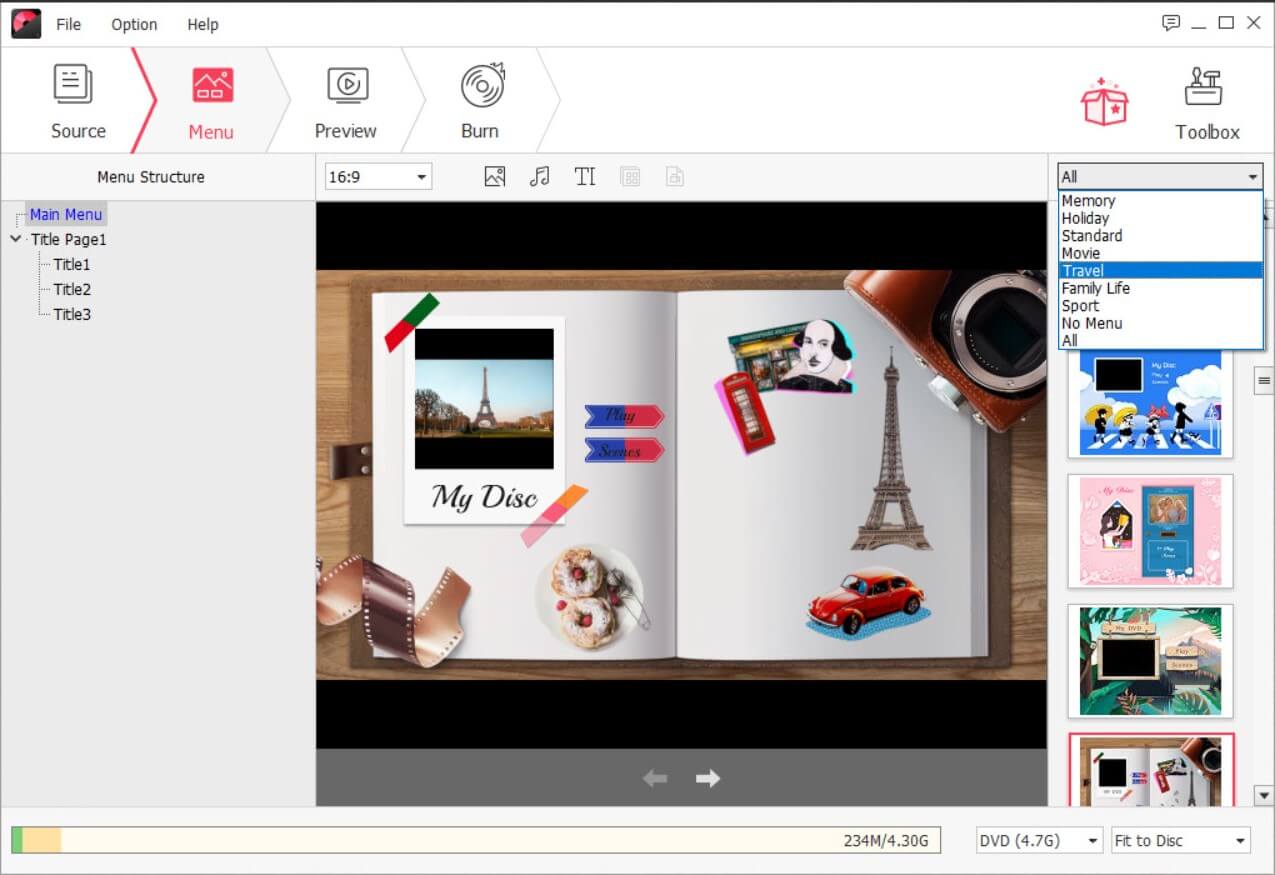
With this DVD creator, you are able to make a beautiful main menu page and each page inside.
Step 6. Preview and Burn Photos to DVD
If you are satisfied with the result in the preview screen, click “Burn” to start burning pictures to a recordable DVD disc that you have inserted.

DVD Slideshow Maker works so well on both Windows and Mac OS. Download the free trial and then you can create a good-looking DVD in a few minutes. Any queries, feel free to leave a comment below.
Free Download Free Download