
AVI (Audio Video Interleaved) videos are not supported by most of the DVD players. If you have some collection of AVI videos and want them to play on a DVD player, you can burn AVI to DVD, so the AVI video will turn into a format that players can read. Learning how to convert AVI to DVD is so easy. Here are 7 easy steps to follow in creating a DVD from AVI video file. The first important work is to download an AVI to DVD converter.
DVD Creator is one of the best tools for burning AVI to DVD since it can keep the best quality of the AVI video. You can choose to burn AVI to Video DVD disc, DVD folder, or DVD folder. Besides burning a Video DVD disc that is playable on DVD player hardware/software, you can burn AVI to a Data DVD disc for backup and play on the computer like a USB drive.
Free Download Free Download
7 Easy Steps to Burn AVI to Video DVD Disc on Windows/Mac
Step 1. Insert a DVD-5/DVD-9 Disc to the DVD Drive
Insert a recordable DVD disc to your internal/external DVD drive for burning AVI. DVD Creator supports DVD 5/9 disc including DVD-R, DVD+R, DVD-RW, DVD+RW, DVD-R DL, and DVD+R DL. Most of the DVD drives also support them. The storage capacity of DVD-5 and DVD-9 is as follows.
DVD-5 (12cm, SS/SL): 4.38 GB (4.7 G) of data, about 2 hours of video.
DVD-9 (12cm, SS/DL): 7.95 GB (8.5 G) of data, about 4 hours of video.
Step 2. Choose the DVD Burner – “Create a DVD Video Disc”
Launch DVD Creator. On the main interface, the most important tools are listed. We are going to burn AVI to a Video DVD disc, so choose the first one – “Create a DVD Video Disc” under DVD/CD Burner.

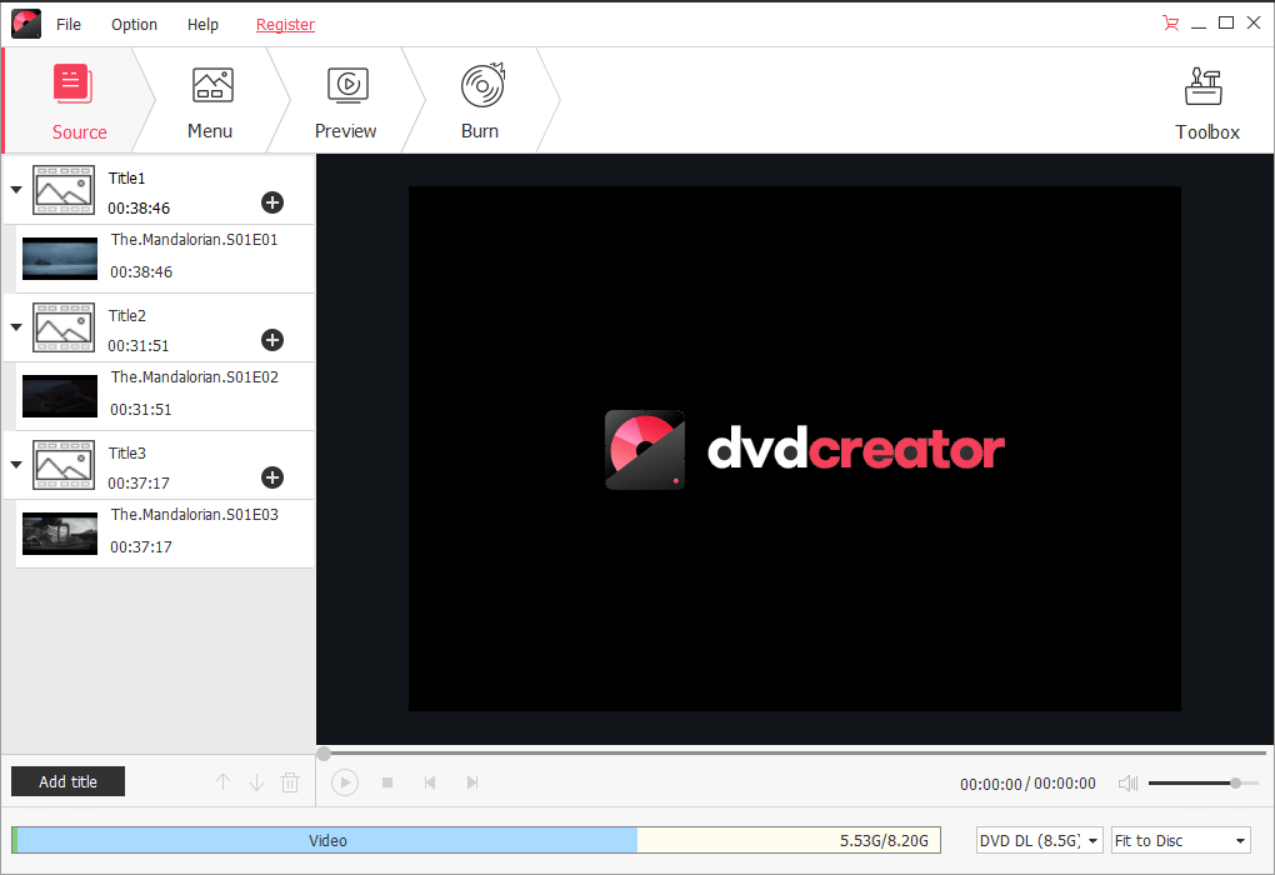
Step 3. Add AVI Videos to the Video DVD Burner
Add all your AVI videos (or videos in other formats) to the Video DVD burning tool. If the source AVI videos you add exceeds the capacity that a DVD disc can hold, the program will automatically compress the videos to suit the disc and keep video quality as possible.

Step 4. Adjust the Hierarchy of AVI Video Files
Under “Source”, you can drag the AVI videos to adjust the hierarchy. The different contents of the same subject can be placed under the same title as chapters, or under different titles.
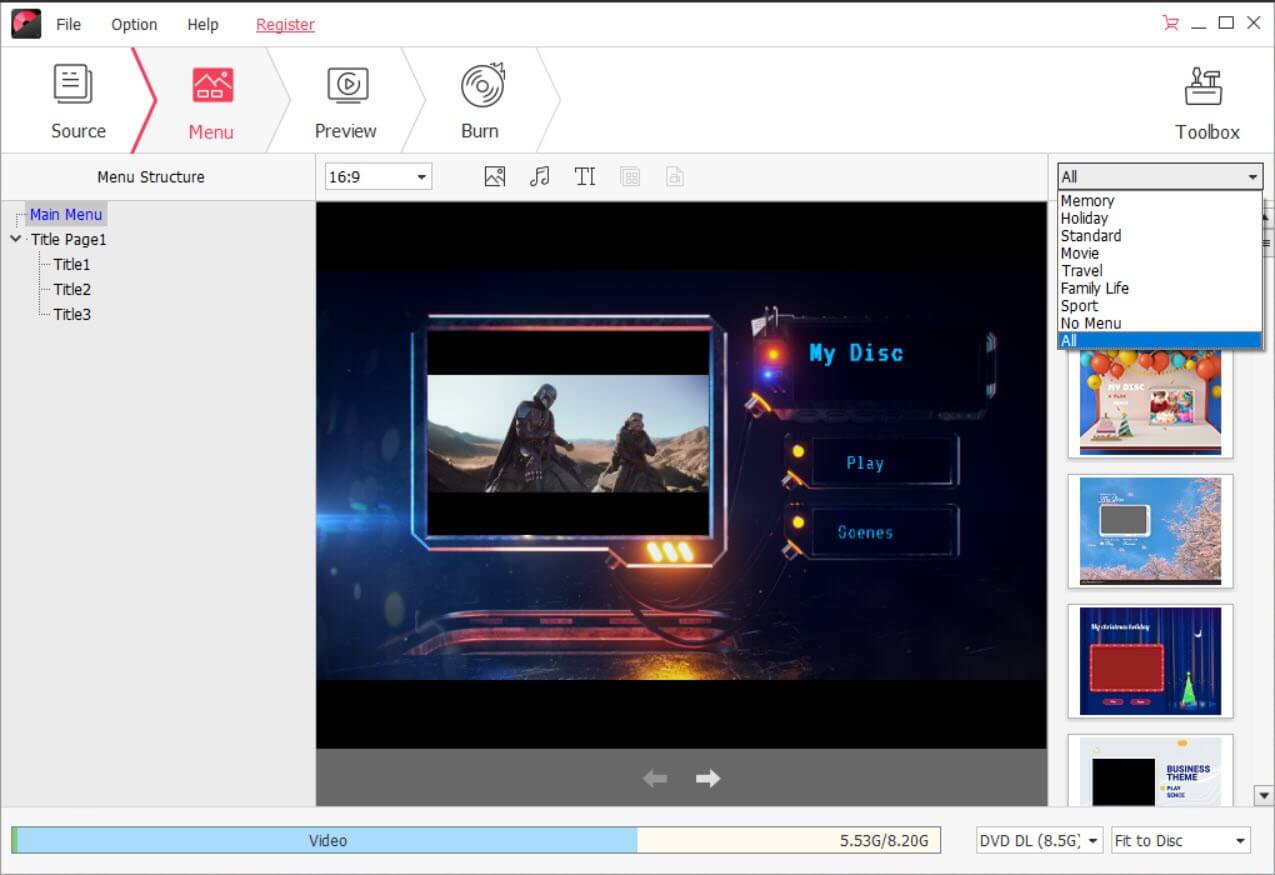
Step 5. Customize the DVD Menu
This DVD creator has a beautiful, straightforward interface for making a DVD menu. There are lots of elements can be customized. The background image, the background music, the text, the frame .etc. can all be changed. You can also choose not to have the DVD menu.
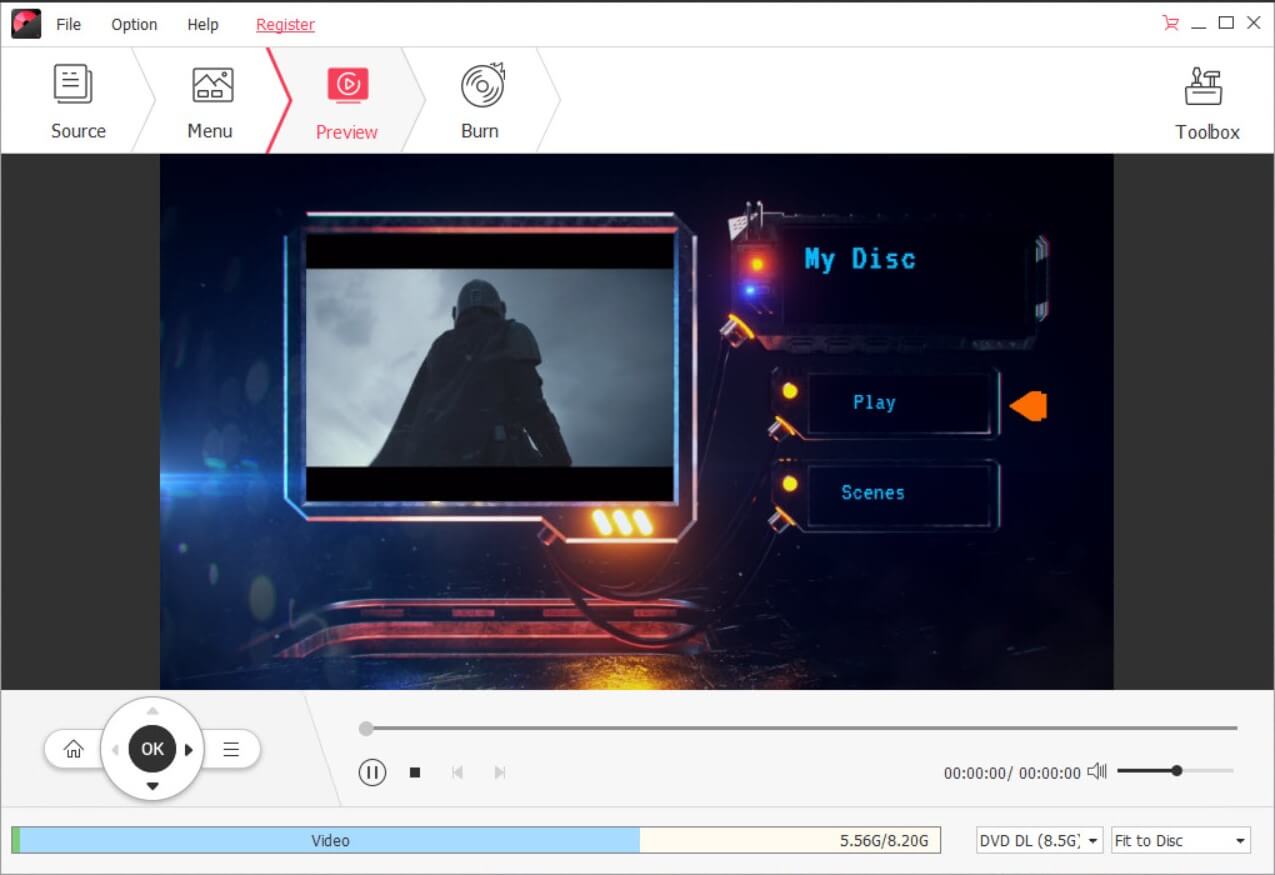
Step 6. Preview before Burning AVI to DVD
This is basically how the DVD disc display and interact on the DVD player after you convert AVI to Video DVD.
Step 7. Start to Burn AVI to DVD with High Quality
Here comes the final step. You can choose to burn AVI to DVD disc, burn AVI to ISO, or burn to DVD folder. The burn speed can be really fast. You will soon get a playable DVD disc created from AVI videos.

Conclusion Part
Besides burning AVI or other videos to DVD, this DVD creator has many useful DVD tools.
• Slideshow Maker – Create incredible photo slideshows with music.
• ISO to DVD – Burn ISO image files to DVD.
• Video Editor – A simple editor to trim, crop videos, add subtitles, apply effects and more.
• CD Burner – Burn music to Audio CD with only 2 steps.
• DVD to DVD – Copy unprotected DVD to ISO file or DVD folder.
• …
If you are a person who likes homemade DVDs, Blu-rays, or CDs, it is worth a shot.
Free Download Free Download
