
We don’t need too many tools listing in one article for choosing but need one or two products that are really helpful to finish the task. In order to make a professional as well as a good-looking DVD menu, it is best to get a DVD menu creator that has the ability to provide beautiful DVD menu templates, has a built-in chapter maker and gives you lots of freedom to customize the menu.
Two products we mentioned in the post are all powerful DVD menu creators. The first one is so simple to use. It owns plentiful nice-looking templates to create a DVD menu in a few minutes. Most icons and information on the menu can be customized, but not all. The second one is fully customizable. You can even add multiple subtitles/audio tracks to the DVD. This software might be a bit complicated to use, but just a little.
Keep reading to learn how to make a DVD menu with these applications.
Make Attractive DVD Menu with the Best DVD Menu Creator
For most users, DVD Creator might be the best tool for making a DVD menu. It’s a simple, efficient, and intelligent software that lets you create professional DVD menus in a short amount of time. It has rich templates for different topics (Memory, Holiday, Standard, Movie, Travel, Family Life, Sport), for a total of almost 100. On this basis, you can personalize the DVD menu, like changing the background, edit the text, replacing the button, .etc. Download the free trial of the best DVD menu creator, and start to make a DVD menu.
Free Download Free Download
Step 1. Launch the Program and Click on “Create a DVD Video Disc”
It is only possible to make a DVD menu when burning a video DVD. So, launch the DVD creator and click on “Create a DVD Video Disc” on the main interface.

Step 2. Add Videos/Photos and Adjust the Level Structure
DVD Creator allows adding videos or photos for burning a Video DVD disc. If adding photos, they will automatically generate a video slideshow. After all the materials are imported, you can drag them to adjust the level structure.

Step 3. Choose a DVD Menu Template and Start to Personalize the Menu
Select a suitable DVD menu template. Now we can make it more personalized and special.
• Click the image icon is to change the background image. You can use the frame of video or use an external image.
• Click the music icon is to change the background music. You can trim music, check the box of “Fade In”, “Fade Out”, and “Auto Repeat” as you like.
• The text icon is to add a text box. The font, size, bold, color, etc. can all be customized,
• The fourth icon is used to change the thumbnails.
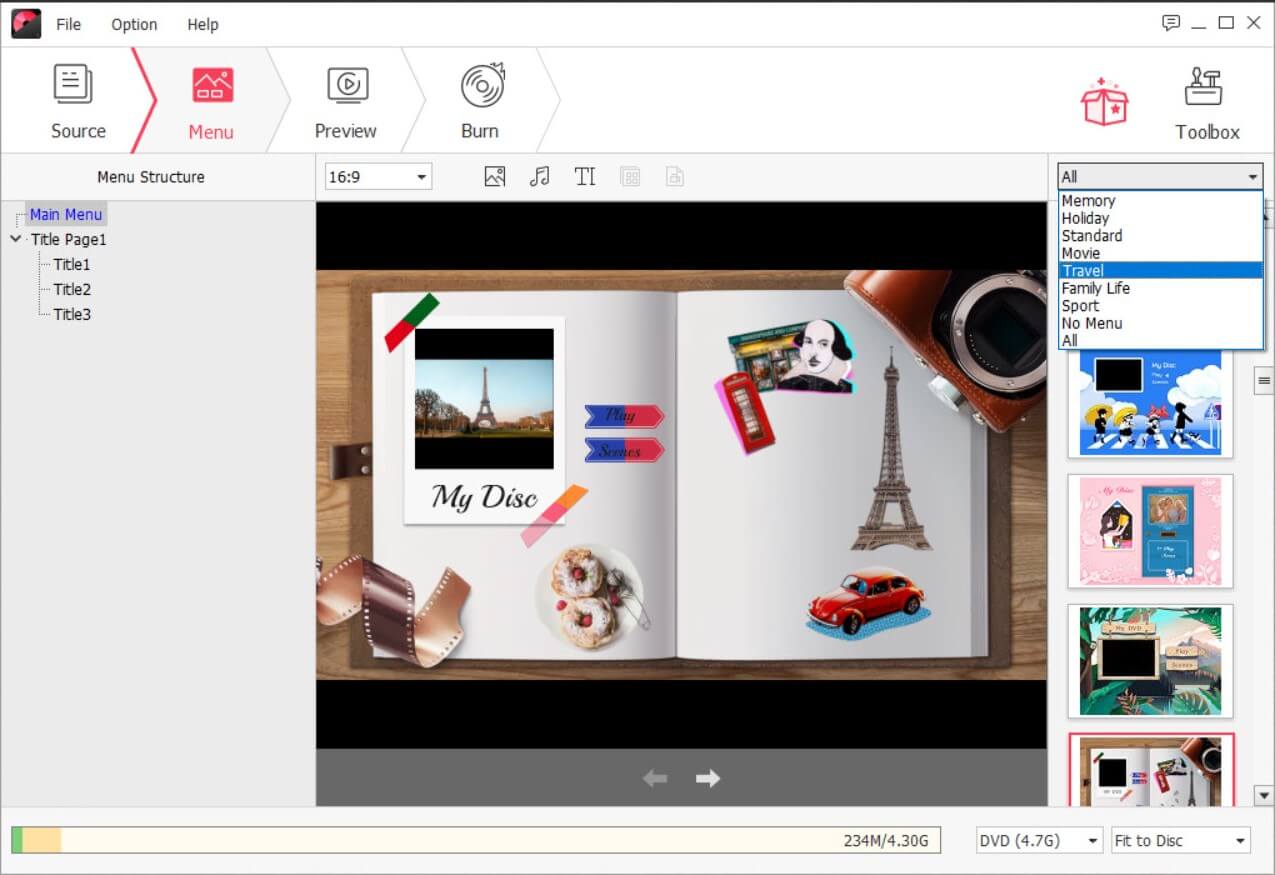
• The fifth icon is used to make DVD chapters.

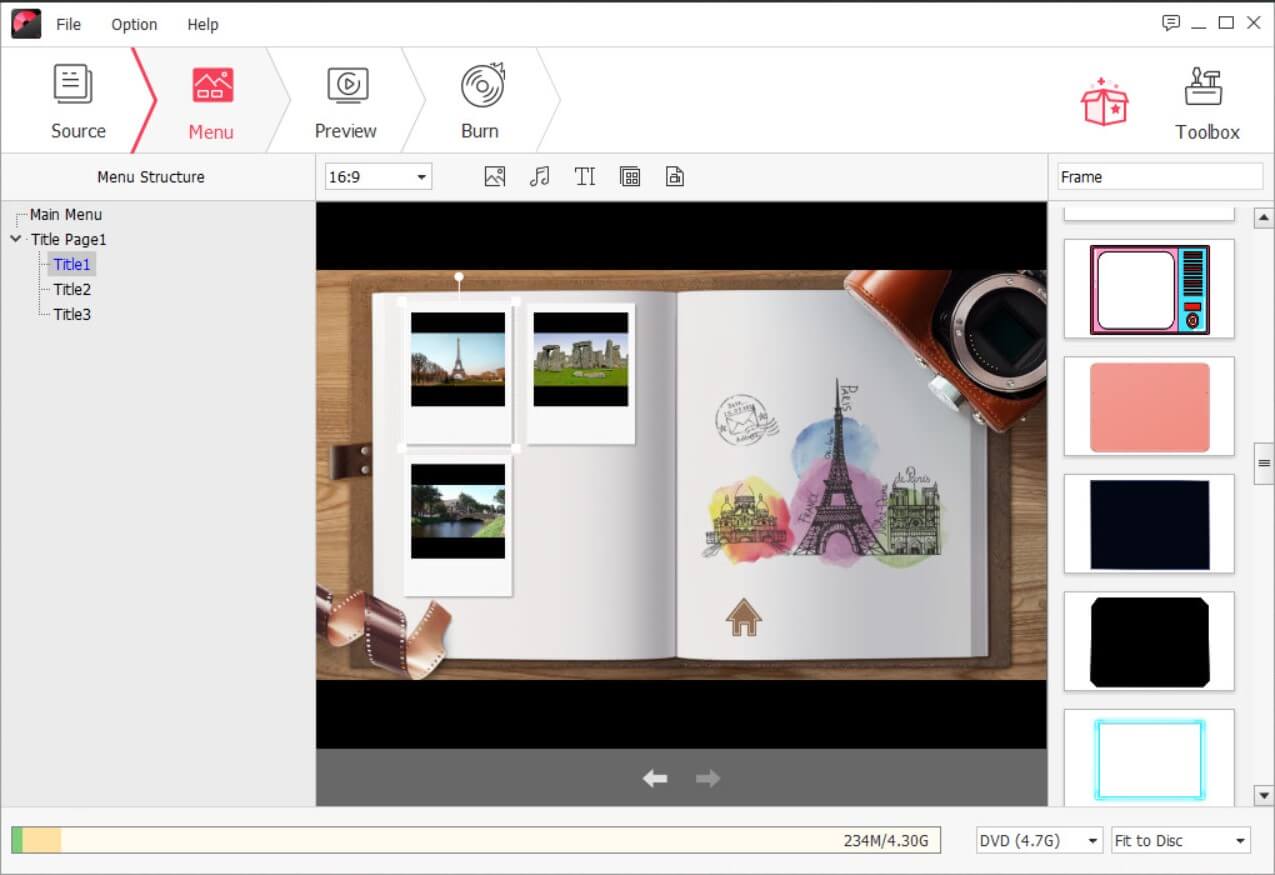
Step 4. Customize the DVD Menu Page by Page
Click on the arrow to jump to the next DVD menu page. You can select another style for the frames and the buttons.
Step 5. Start to Burn DVD with Menu and Chapters
If you are satisfied with the results of the preview, here comes the final step. Just insert a recordable DVD disc and click on “Burn”. It will start burning videos to DVD with menu.

Fully Customizable DVD Menu Creator – Make a DVD Menu that is Exactly What You Wanted
Once I needed to make a DVD with multiple subtitles and found ConvertXtoDVD. What is impressive, it is also powerful in making a DVD menu. It can almost be said to have the ability to “fully customize” the menu yourself.
P.S. This application only works on Windows.
Free Download
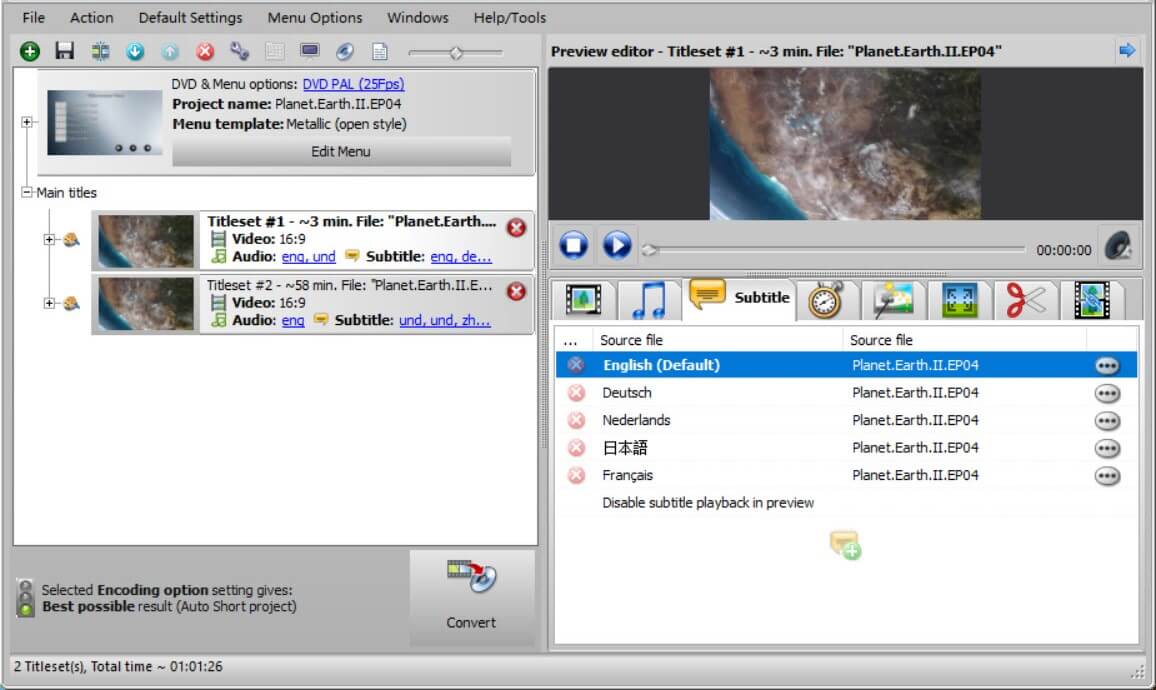
Step 1. Add Videos to the Program and Edit the Videos
Add the source videos to the program. Here you can adjust the level structure, and do some edit to the video such as adding multiple audios/subtitles.
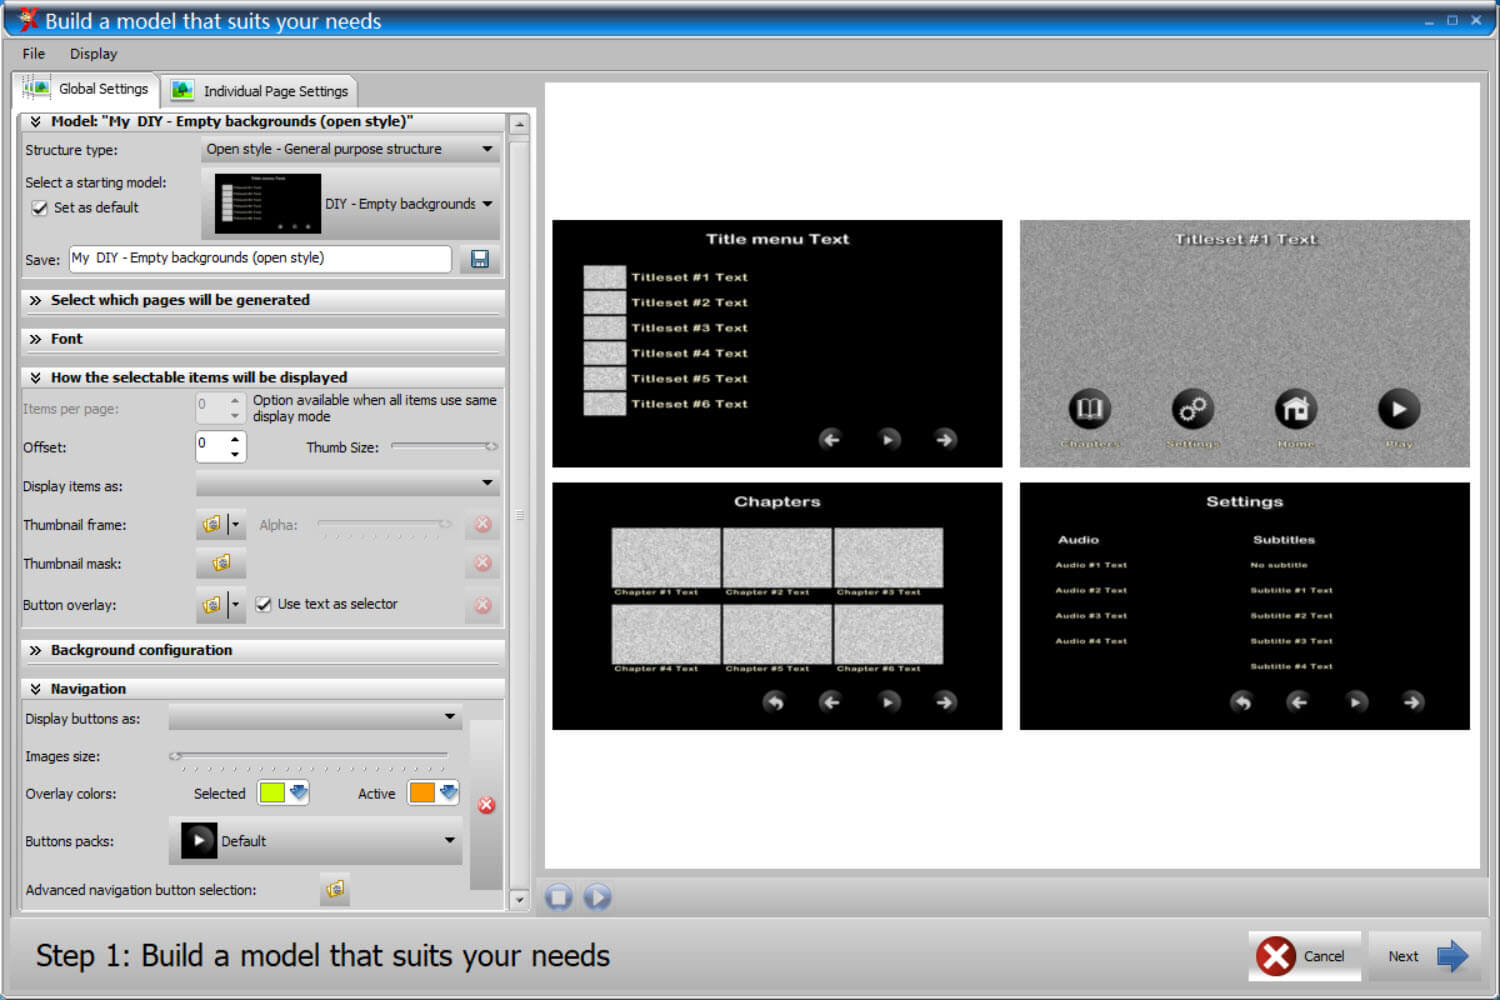
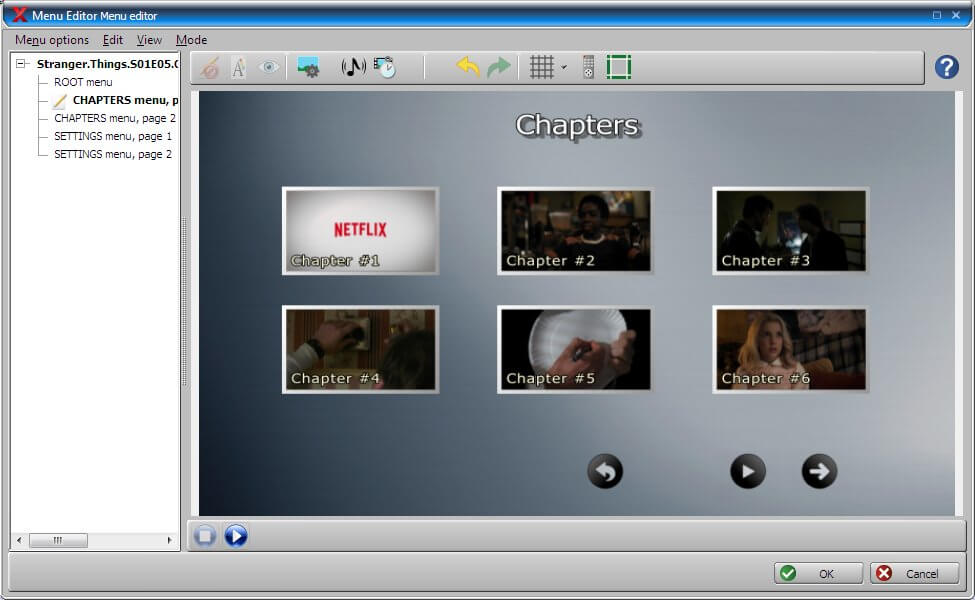
Step 2. Activate the Template Editor to DIY DVD Menu Template
To activate the template editor, click on “Menu Options” > “Create new template”. Then this interface comes. You can fully customize the menu under “Global Settings” and “Individual Page Settings”. The program itself also has step explanations and tips.
Step 3. Confirm the DVD Menu Framework
Click on “Next” > “OK” to make more customizations. It is notable that you can’t come back from the next step.

Step 4. Continue to Adjust the DVD Menu and Burn the DVD
Here you can edit more and preview the menu in real-time. After done, select your DIY menu template as the theme, and then you can insert a DVD for burning.
Finding an ideal tool is very important so I think we have a good beginning. You can download the free trial of DVD Creator or ConvertXtoDVD, and see if the operation is easy to use.