
If you want to burn MOV (Apple QuickTime Movie) videos to DVD for playing on a DVD player, this post is right for you. Burning MOV to DVD on whether Mac or Windows is quite easy actually.
For example, if you have downloaded movies or homemade videos etc. in MOV format, you can definitely try to transfer your MOV contents to DVD format. As secure as DVDs are, it’s actually quite simple to burn MOV to DVD, which makes it a huge time-saver. All you need is a DVD, which is available in almost every nearby store, and a straightforward DVD burning software tool to help you achieve that.
BlurayVid DVD Creator is a perfect choice for you. It supports all popular disc types; you don’t have to go through a hard time finding a suitable DVD format for your MOVs. It’s designed for everyone, with one click and you’re all set. It saves a lot of time by enabling you to directly burn multiple videos of different formats at one time. On top of that, for people who value quality, BlurayVid makes as best quality a DVD can have as possible.
You can download the free trial here:
Free Download Free Download
And next is how to burn MOV to DVD using BlurayVid DVD Creator.
Step 1. Launch the software and make your choice

First off you need to download and install the software to make the next steps possible. Then launch the software on your computer to open the main interface, choose “Create a DVD Video Disc”.
Step 2. Import videos or pictures to the software

On the interface, there’s a “+” button right in the middle, and that’s where you want to click. Click it to add pictures or MOV videos from your computer. An alternate option is to drag and drop desired files into the frame. Once done successfully, the loaded videos will appear on the left side of the screen.
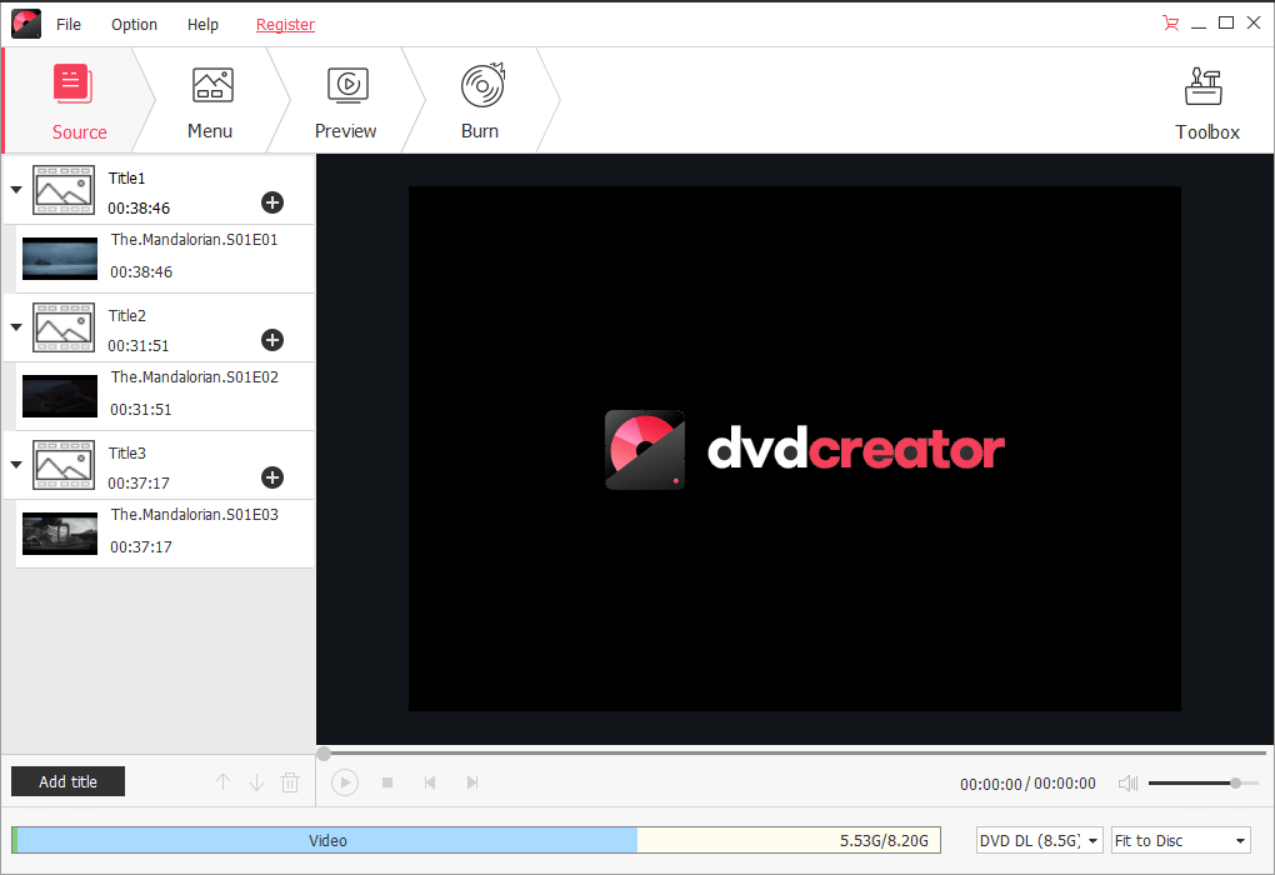
If there are more videos you want to add, just click the “+” button under the “title”. You can create a new title by clicking “Add Title” on the bottom left.
Notice that videos can be trimmed, filtered and altered in any way if you hover over the pencil icon as showed in the picture. Alternatively, you can also right-click the thumbnail and select the Edit option from the drop-down menu.
The order of selected videos can be changed when you first click the targeted video and then hit the up and down button placed beside “Add Title”.
Step 3. Customize your own DVD menu template
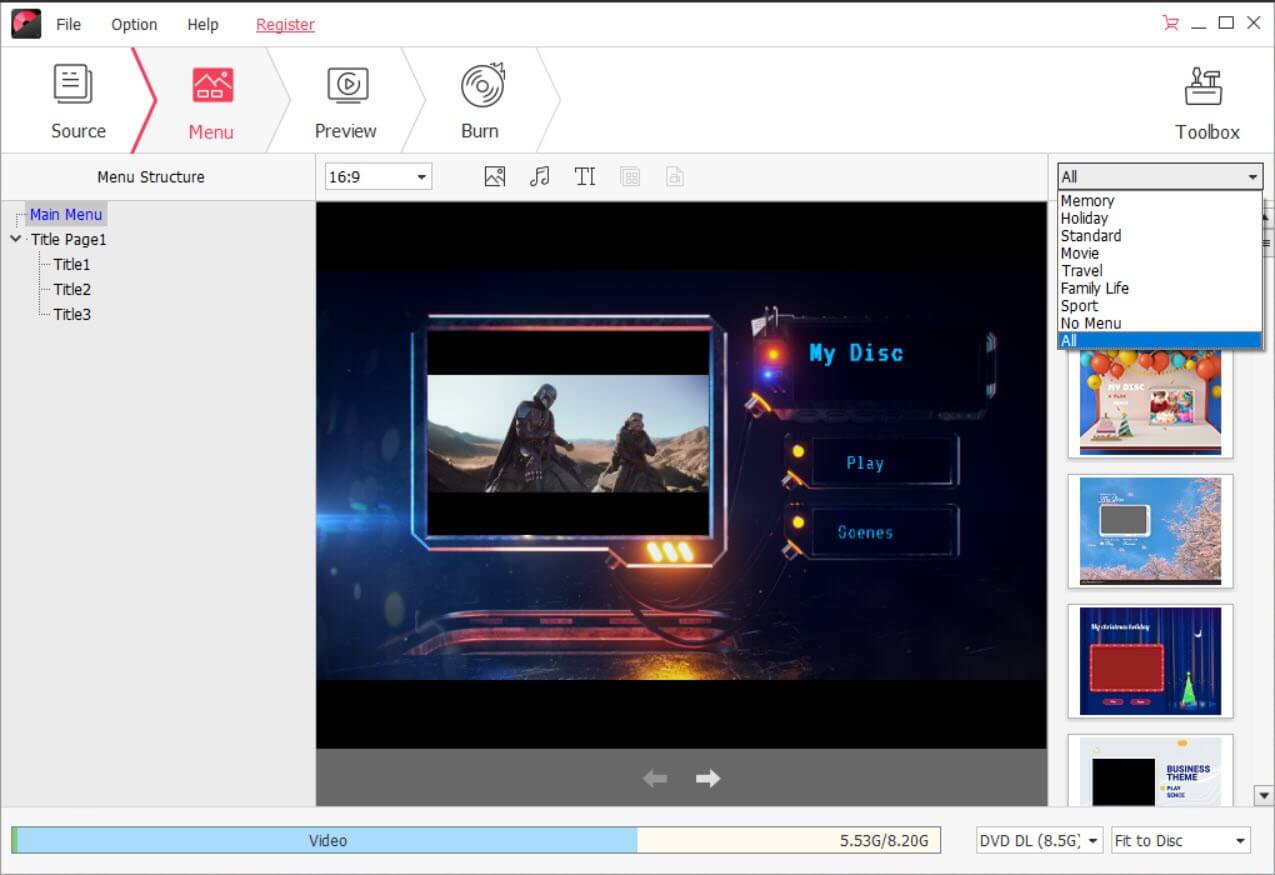
Open “Menu” and you’ll see a list of template designs on the right side of the screen. Double-click to apply the chosen one to your video. Once selected, you’ll have the chance to use your imagination to the utmost and change the template, whether its background image or music, you can change them to whatever you like.
Step 4. Preview and burn MP4 to DVD
The “Preview” tab is here to help if you are not satisfied with the video that you’ve made. Feel free to go back and make changes by clicking the “Source” or “Menu” tab.
When you decide to finally make it, click the “Burn” tab and choose “Burn to disc”, and it will show you some settings and one of which will meet your demand. After making settings perfectly right for your DVD, enter a blank DVD disc into your computer and click “Burn” to get everything started.
By following the steps, you can get your MOV burned to DVD safely and easily with BlurayVid DVD Creator.
Free Download Free Download